Saturday, September 29, 2012

Happy Birthday Bobby Meander Book


For my nephew Bobby I made him a meander book. I filled it with photos of him from birth to right up to his birthday and I hung it from his gift instead of a card.
He loved it.

Supplies I used:
12 x 12 sheet of blue card stock to make the meander book. 
12 x 12 sheet of card stock "Planet"  from Oriental Trading  Co. for the  mats
(I bought it a couple years ago)
Strip of red paper 2 1/2 inches wide for binding
Robot Stickers from Sandylion Essentials  
Black ink
PoGo Printer from Polaroid

I used my Polaroid PoGo printer to print out my photos for the book, and the photo paper is 2" x 3" which is the perfect size for the meander book, and it takes no ink to print which is a bonus.
I love my PoGo printer because I can take a photo and send it to the PoGo printer via Bluetooth, MSM or by connecting the computer. So even if I didn't take the photo, but my sister did I can sync her phone to the PoGo and have her send it to the PoGo and it prints.
It travels everywhere, the battery life is not great, but if you have an outlet, then no worries, and the photo paper has adhesive on the back so no need to worry about carrying adhesive with me. I take it everywhere and the photo paper is not expensive.


For instructions on how to create a meander book :
http://youtu.be/jdtjLboY59s

It's from Mary at http://www.cardztvstamps.blogspot.com/  she is an amazing teacher. I wish I would have learned it from her. She makes it easy to understand. Of course, I found it on You Tube years after I learned how to make the meander book, but when I am teaching anyone how to make it and they need to recall a step, I send them to this link.


 The front cover of the Bobby's book. 


On the first page I used stickers for Happy Birthday, and I added a photo of his mom and dad when they were teenagers. I figured he would get a kick out of seeing them young.


The rest of the pages had photos of Bobby and his time with his cousins.


Last page of meander book.


I punched 3 pockets  in Bobby's book, so i could stuff stickers in them.


The red 2 1/2" strip of paper used to finish the book binding.


Back of Bobby's meander book.


This was such a fun project to make for my nephew. 
What kid doesn't like a book made just for them and all about them?
I filled it with photos of Bobby and all the outings he had with his cousins (my kids).
I made a Hello Kitty one for my other Bittie (niece) for her Birthday, and she loved it.
This is a fantastic way to give a mini album that takes less than an hour to make.


Wednesday, September 26, 2012

Photo Paper Clips

One day i was walking through Michael's and I came across a package of paperclips with round flat circles on the tops in the clearance isle.
 I bought them and they sat in my supply box for a year.

 Then one day i was creating  my daughter's birthday book and I was  trimming photos down and I noticed in the background I had taken photos of the photos on my walls.
In essence, I had by a happy accident created miniatures of my daughters artwork, and of photos of my kids. 
Now, I punched them out of the cropped photo scraps.
I ended up with at least 20 images, you would be surprised what you end up with in the background of your photos.

I put them in a bag and I knew i would find the perfect project for them.
Then a week or so later, i remembered I had the paperclips with the round edges in my box of odds and ends.
The project fell into place so easily and in my stockpile I had clear round epoxy circles which fit the round space on the paper clips.

I must say, these are one of my favorite treasures because they have miniatures of my daughter's artwork and photos of my kids.
 I don't use them to hold papers, instead they are just on my desk keeping me company.
It's a great and simple project that can be used for jewelry, hairpins, rings, and anything else you can stick a miniature in.

All it takes, is photos taken a few feet away and the camera does the rest. 
It's worth a try.
For me, this has become one of my favorite activities, after all it's a way to have your favorite photos or images with out taking up too much space.


Supplies:

Paper clips with circles, or any flat surface
circle punch same size of surface
mini glue dots
photos of artwork, or photographs 
epoxy circles


Thursday, September 20, 2012

Happy Birthday Ms. B


For Ms. B's Birthday (my son's teacher) we give her See's Candy every year, but this year I wanted to make her a set of note cards. As a teacher I know she writes her share of notes, and thank you cards, so i thought it would be a good idea.


For the Birthday Card  I used:

Recollections card stock: in teal  for the card and in tan for the mat under the cake.
Birthday card paper with school sayings I've had for years and I don't recall what the name is but it was open stock from Michael's.
I used Jolee's Birthday sticker set, it's an old one, and it came from my stockpile.
I used Sizzix's Notebook embossing folder by Tim Holtz, for the tan mat under the birthday cake.
The envelope was made using paper from Recollections All Seasons paper pad. This pad is so fantastic, i have used it more than any other pad.


Ms. B birthday card


For Ms. B's gift, besides the box of See's candy I made her this note card set. It came out better than i imagined. She is not a science teacher, she actually is a Special Education teacher, but I like Planets, and since she teaches many subjects I thought it fit.

Note card set: 
Paper:
I used Recollections card stock in tan for the cards, light orange for the planets circles and in dark green for the chalkboard and tag.
For the mats on the  note cards I used Michael's open stock paper, it's school lined paper, I have had this one for a while also, but I cut it into mats and did not keep the strip with the paper's name. You can use any lined paper for the same look. 
Recollections Mosaic Memories paper pad.

Quickutz Dies:
Chalkboard
Saturn

For the chalkboard I used :
On the chalkboard frame I used Recollections Mosaic Memories paper pad (another of my favs).
For the inside of the chalkboard I used dark green Recollections card stock.
For the chalk on the chalkboard, I just turned over the cut out from the chalkboard frame as the paper is not double sided and the back is white, it saved me a step.
For Saturn:
I used Recollections light orange card stock for the planet's circle.
For Saturn's ring I used Recollections Mosaic Memories paper pad. 
For the envelopes;
I used every single sheet of the ledger paper in the Recollections Mosaic Memories paper pad.  I love them. I wished they gave me more of each of the 4 designs. I will be buying this paper pad again.

I tied up the note card set with red and white baker's twine. 


Ms. B note card set

This was simple and took very little time, once i came up with the design. Note cards are a great gift for all those who teach, help, or care for your children. This year I will be making them for all the aides and staff that work with my children.

Sunday, September 16, 2012

Halloween Cards for I feel The Love Project

This is the first year I have made cards for I Feel The Love Project, and it was so fun and rewarding. 

I made 12, my daughter Justice made 10 and my friend Sharon A. made one.

I Feel The Love Project is a great cause, and all it takes is a card. If you like to make cards and you want to help out, here is the link:

Please go and check out her blog. Thanks.

All cards were made using:

Recollections cardstock in black, tan, purple, grey and orange.
Recollections All Seasons paper pad.

Graphic 45 cardstock in: 
Le' Romantique Collection :  Enamored Embrace, Celebration,  and Well Groomed 
On the Boardwalk Collection: On the Boardwalk
A Proper Gentleman Collection: Man About Town


Cricut Cartridges:
Chic & Scary
Happy Hauntings
A Child's Year
Wrap It Up
October 31st
Spring Holiday Cards

QuicKutz Dies (LifeStyle Crafts):
Cat
Tombstone & Cat
Pot O' Gold
Hat & Broom
Trick-Or-Treat Bucket

Spellbinders Shapeabilities:
Halloween Fence Scenes and Shapes
Nested Bats
Graveyard Scenes and Shapes
Nested Candy Corn

Cuttlebug Embossing Folders:
Swiss Dots
Stars

Sizzix Tim Holtz Embossing Folders:
Retro Circles
Checkerboard
Rays

Xyron :
5" Create-A-Sticker
X Teresa Collins 1"

Foam Tape, Tape Runner, Glue dots, Glue stick
Stickles: Green and Black

Stamps:
CardsTv: Happy Days
Inkadinkado: Happy Halloween

Stickers, Patches and Ribbons all from my stockpile 
(sorry i have no names for them, they are out of packaging and were odds and ends).


MY CARDS:
I made 12 cards for I Feel The Love Project. 
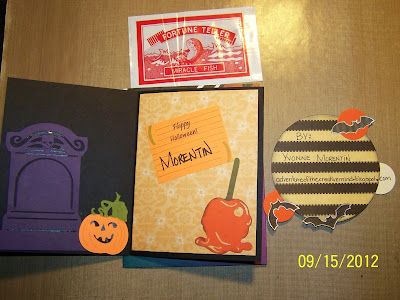
Inside I put a fortune fish, when placed on the palm of your hand, depending on how it curls and flips, it has a meaning. 


This is the tag I used to bind my cards that I sent.

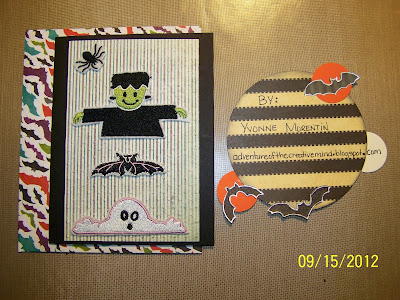
Card 1
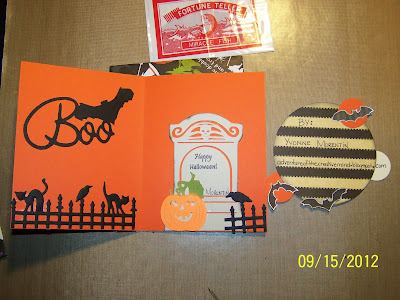
Inside of Card 1


Card 2
Inside of card 2


Card 3
Inside of card 3


Card 4
Inside of card 4


Card 5
Inside of card 5


Card 6
Inside of card 6


Card 7
Inside of card 7


Card 8
Inside of card 8

Card 9
Inside of card 9


Card 10 (my favorite )
Inside of card 10


Card 11
Inside of card 11


Card 12
Inside of card 12


 MADE BY MY DAUGHTER JUSTICE:
She made 10 cards for I Feel The Love Project.
She is very creative, and I am very proud of her.
Justice has Autism and in art and creating  she is able to express herself';  
it is one of the many things we share.


This is the tag I used to bind Justice's cards that we sent.

Card 1
Inside card 1


Card 2
Inside card 2


Card 3
Inside card 3


Card 4
Inside card 4


Card 5
Inside card 5


Card  6
Inside card 6


Card 7
Inside card 7


Card 8
Inside card 8


Card 9
Inside card 9


Card 10, 
Inside was just stamped Happy Halloween.


My Friend Sharon A.'s  (aka Miss Kitty's) card:

This is the tag I used to bind Miss Kitty's card


Front and envelope of Miss Kitty's card
Inside of Miss Kitty's card

Back of Miss Kitty's card.


Wrapped and ready to send:
This was fun, simple and very rewarding. It took a couple of hours, about 2 1/2, but we were having fun, and me made some pretty great cards for a really great cause.
We will have to do this again.